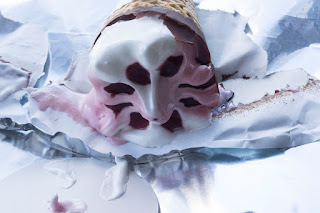
For my sequence of decay I decided to shoot an ice cream melting. As you can see the two photos below are the beginning and end of the sequence. Firstly, I'm really not happy with the camera quality, even though I did use my Nikon DSLR, the lens that I used was 18-55mm zoom lens as I wanted a close up shot. However, using this lens doesn't produce the best images unlike my 35mm lens. Next time I shoot this sequence I'm going to make sure that I use my 35mm lens to get the best photographs from it. I did shoot this sequence as RAW files and then edited them all together in Photoshop Camera RAW. When editing them I decided to make the temperature a little cooler to get that blue undertone. I also adjusted the shadows, highlights, contrast, saturation and clarity make the image look better and bolder overall.
The next thing that went wrong was the fact that I didn't have a automatic timer to set the shutter off on the camera, so I had to manually take the photos in 1 minute intervals. Because I had to manually take the photos, I didn't realise until I imported the photos to make the GIF that every time I took the photo, the camera moved slightly making each shot in a slightly different position which mucked up the overall look of the GIF as the photo frame wasn't in the same place. So for the next time I shoot this sequence, I need to make sure that I have a timer to automatically set of the shutter or to properly secure the tripod so that the camera doesn't move with each shot. I decided to do an ice cream melting because, it showed a fast decay from it being frozen to melted and lost all shape and form in 30mins.


The link to the ice cream melting is below
https://www.youtube.com/watch?v=HcuEI2J_izo
Second Attempt at my Sequence of Decay
This is my second attempt my sequence of decay to try and improve from my melting ice cream sequence. The set up for this sequence was my Nikon D3100 equipped with the 35mm lens. The camera was then attached to a tripod with the camera facing down towards the bunch of unopened flowers. For the next 2 weeks everyday I took a photo of the flowers as they opened up to the end of them wilting and dying. Then once I had all the shot I needed I imported them into camera Raw in Photoshop and saved them as jpeg photos as the NEF files are too large to put into a GIF file. I did this to show the small changes that happens during flowers opening up to dying.
the link to the flowers blossoming is below
https://www.youtube.com/watch?v=KEUlk3pyAy4


